
QR codes are widely used in entry and exit systems for various events to monitor the number of participants and ensure that only authorized individuals gain access. However, these systems, along with web servers and scanners, are often quite costly. When operated separately, scanner and server devices require independent management, making the entire system complex.
In contrast, our designed system is a complete standalone solution that offers greater flexibility. It functions as an all-in-one system with an inbuilt web server for managing the participant database. Additionally, it enables real-time identity card creation for each participant and stores the main database locally.
Furthermore, the system allows highly efficient execution of server operations. Both the server host and the device contain the necessary information for QR code-based entry and exit management. It ensures secure local control through its own server, while also offering the option to switch to a cloud-based setup if required.

The device not only handles scanning and entry/exit management but also stores data and automatically generates identity cards for each participant, which can be printed or shared digitally during the event.
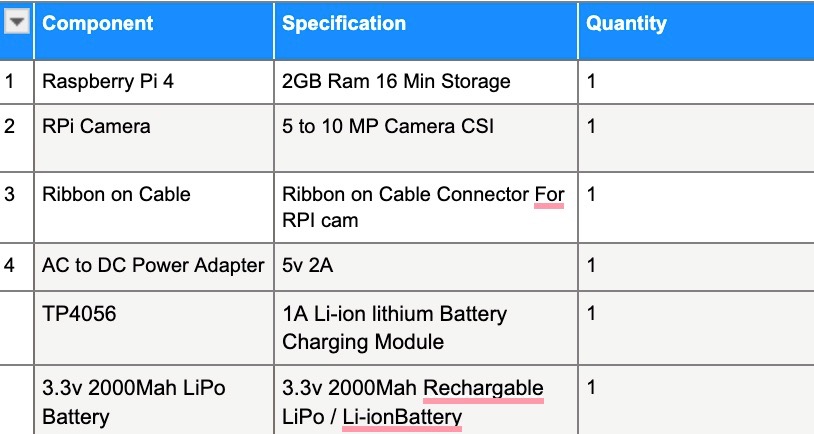
Bill of Materials
Confused about where to buy these components online? Check our verified Electronics components suppliers.
Code for QR-based Entry System
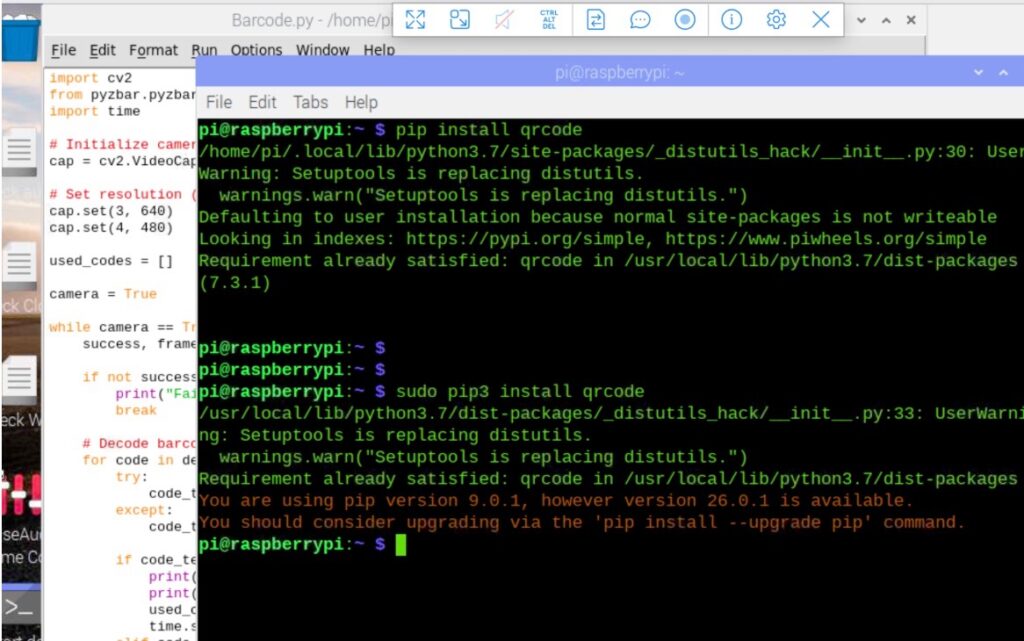
First, we need to install the required libraries for QR code scanning. For QR code generation, install the qrcode Python module. Then, install Flask to create the web server. Next, install sqlite3 for database creation and management. We also need opencv and pyzbar for image processing and QR code detection.
To install all these libraries, open the Linux terminal on the Raspberry Pi. You can access the Raspberry Pi desktop either using HDMI or remotely via VNC. I am currently using VNC. You can follow the instructions on the Raspberry Pi website to set up VNC and access the remote desktop.
Once done, open the Linux terminal and install these Python modules by running the required commands.
sudo pip3 install --upgrade pip
sudo  pip3 install sqlite3
sudo pip3 install flask
sudo pip3 install pillow
sudo pip3 install qrcode[pil]
sudo pip3 install  opencv-python
sudo pip3 install  pyzbar
sudo pip3 install  requests
Now, we need to create two sets of code. One is the server-side code, which creates and manages the database and also enables automated ID card generation for participants. The other is the client-side code, which scans QR codes, interacts with the database, and manages entry and exit.
Finally, based on the verification, the system controls the servo or door actuator to grant or deny access to the event or similar locations.
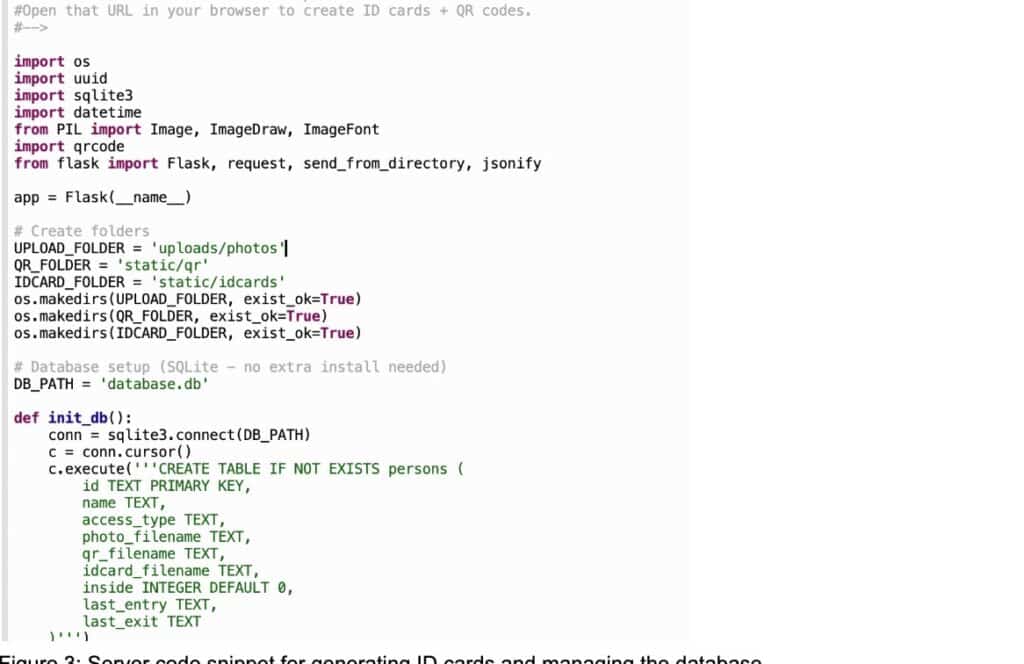
Server Code
In the server code, we use SQLite and Flask to create the database and host the database management system on the same device. We then define the paths where the database files are stored, including participant details, uploaded images, and the generated ID cards.
Within the code, you can configure either a cloud storage path or a local storage path. Alternatively, you can simply specify a folder, and the system will automatically create it in the same location as the code and store all files there.
Flask then hosts the server webpage on the local network, allowing us to manage participants and automatically generate ID cards along with QR codes.
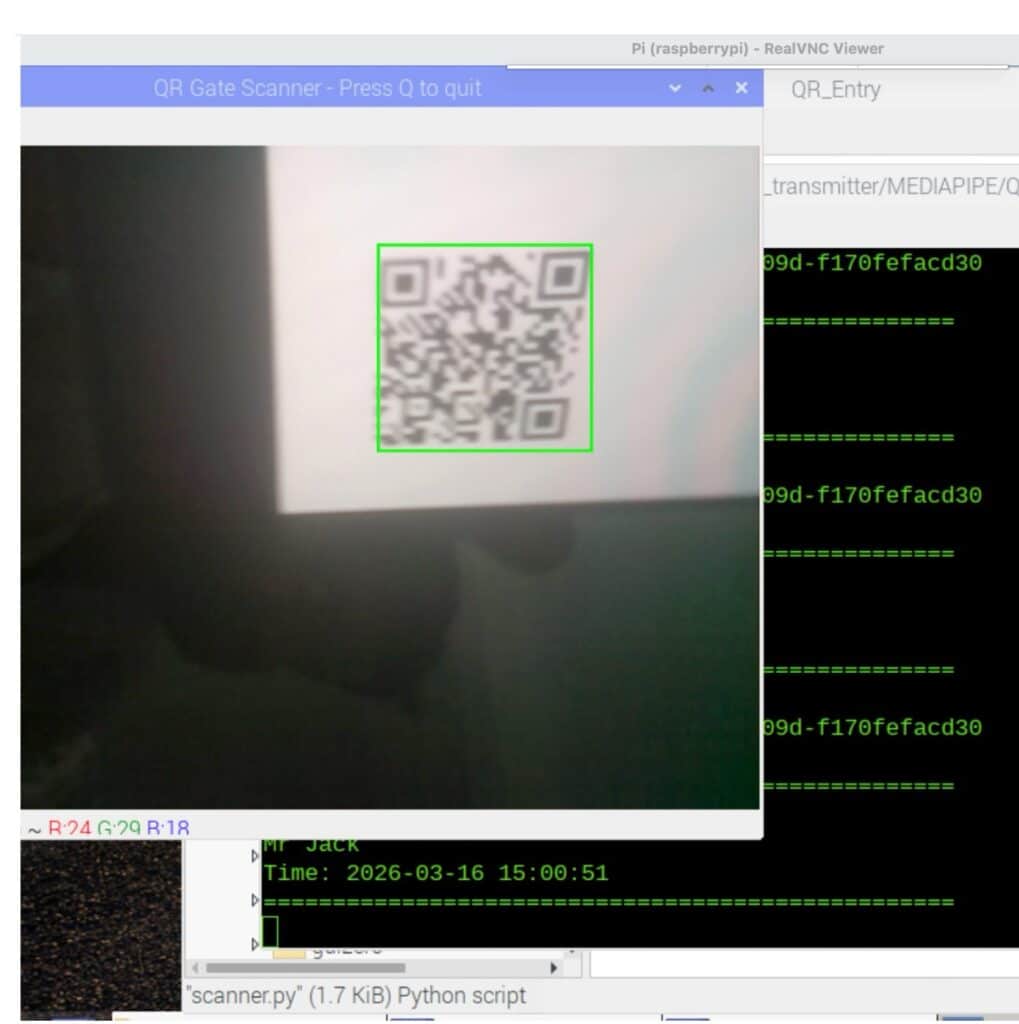
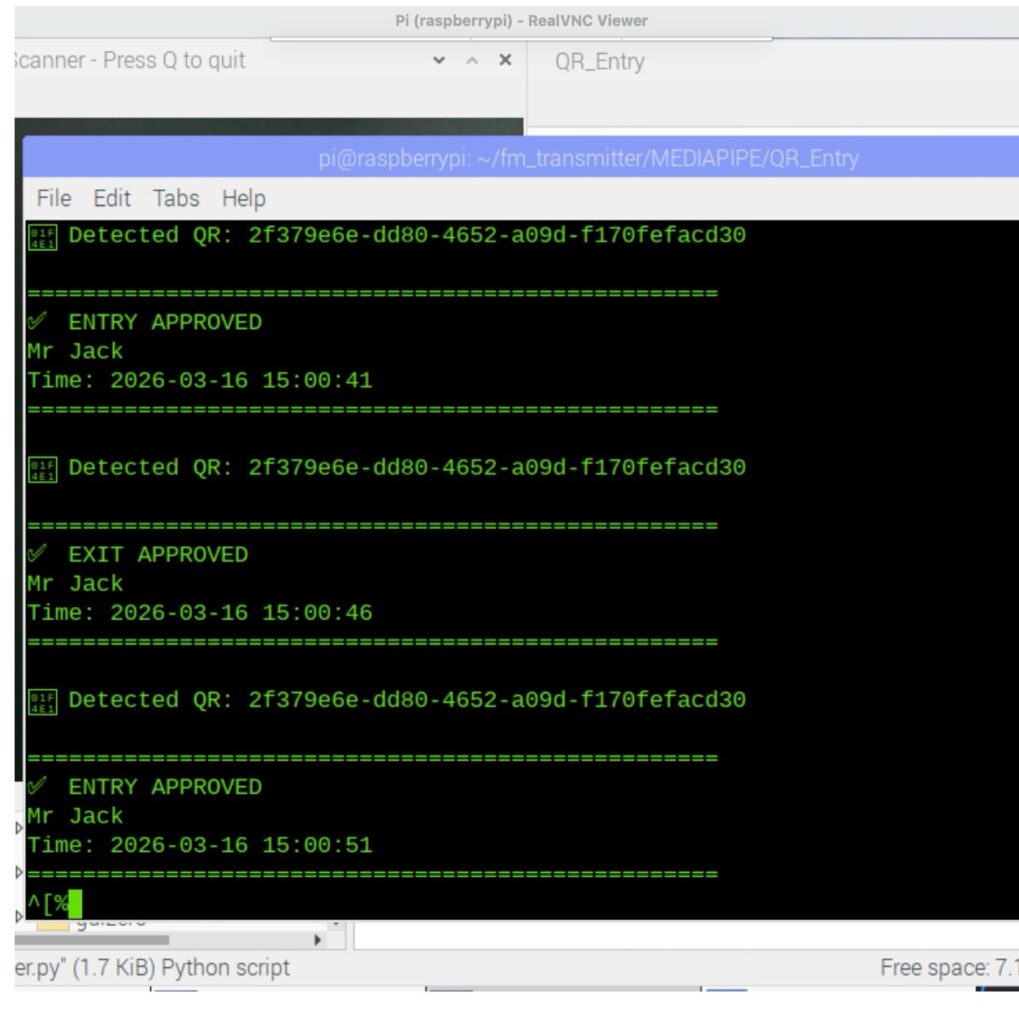
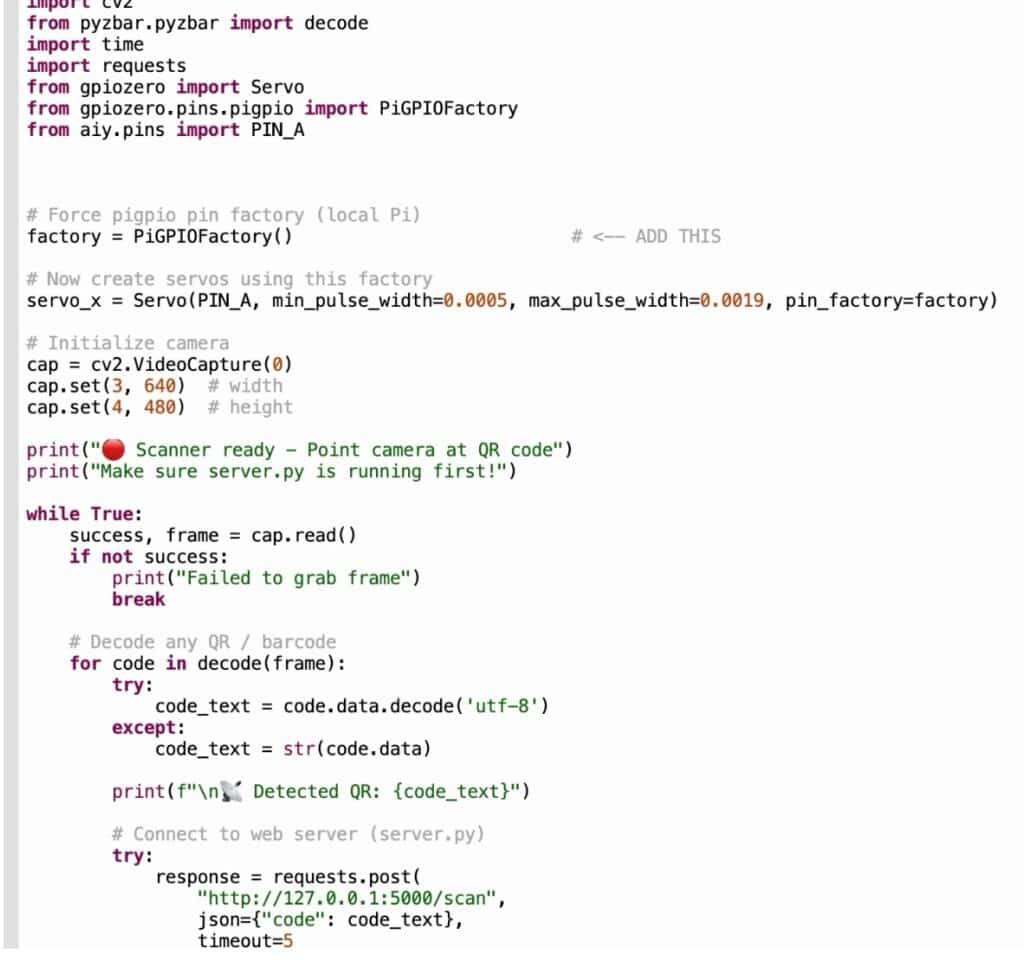
Now, we will create the code for the QR code scanning and entry management system. When the device connects to its local server, it activates the camera to scan the QR code. Once the code is verified, the system checks the database and triggers the servo motor to open the door for entry.
You can also modify the code to replace the servo motor with a door lock or actuator. This can be done by sending signals through the GPIO pins connected to the actuator driver or lock driver.
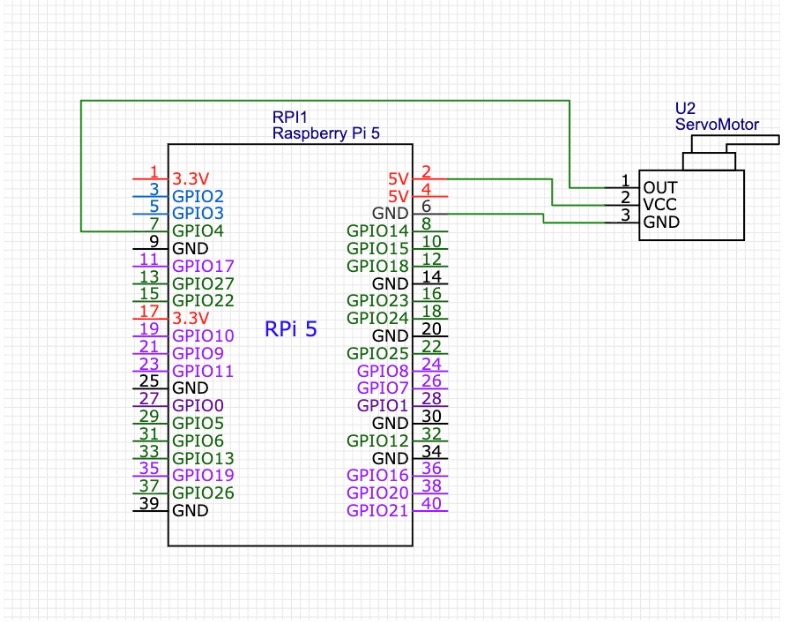
Circuit Diagram
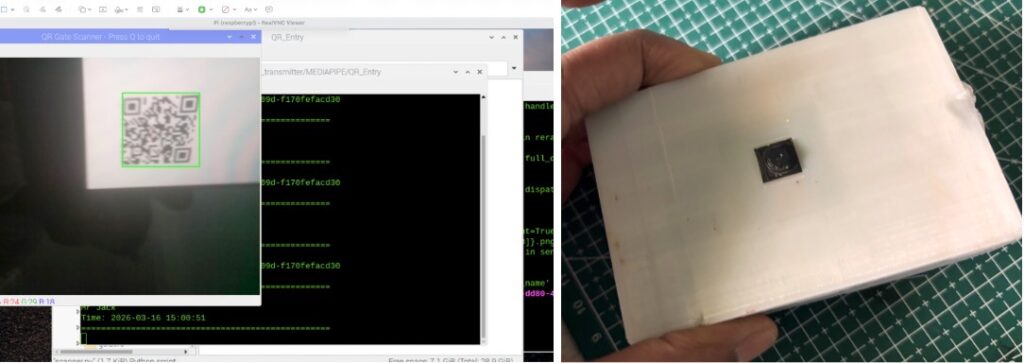
Connect the camera to the Raspberry Pi CSI port, and then connect the servo motor for opening. For my design, the Raspberry Pi voice has been used, which has pin A for the servo motor. However, you can change the pin in the code to any pin on which you have connected the servo motor.
Testing QR-based Entry System
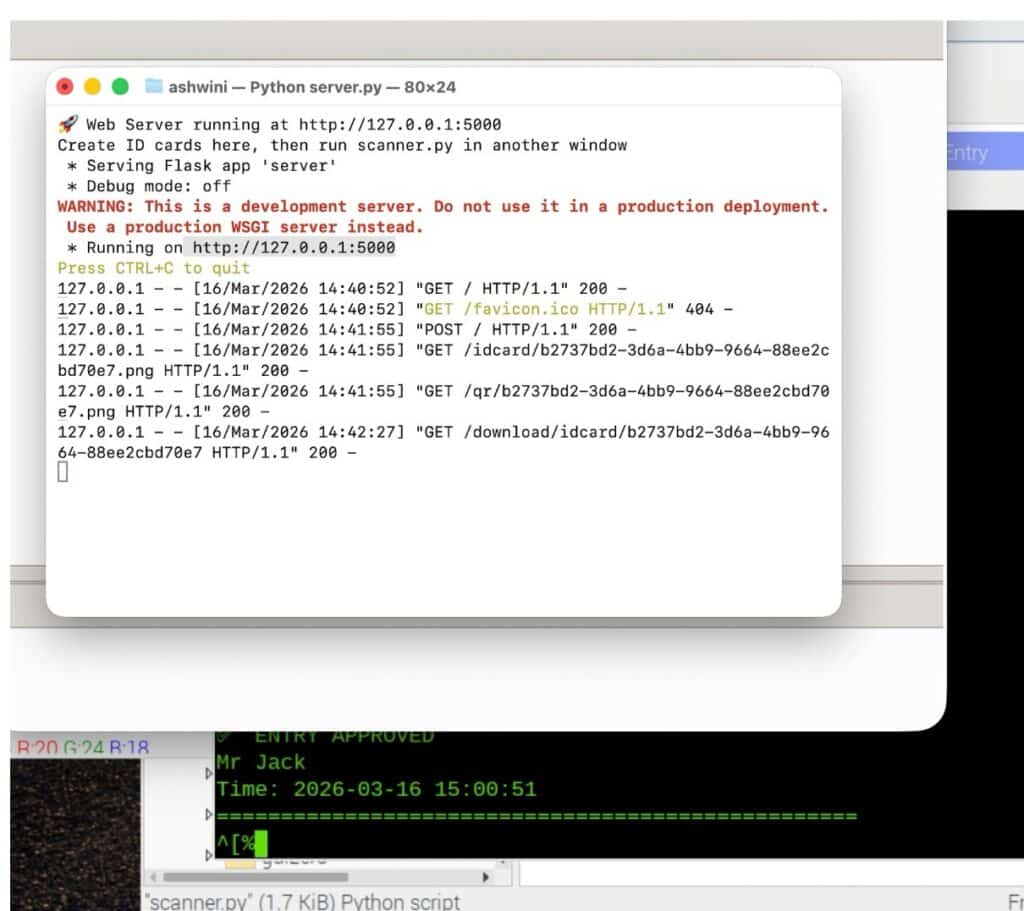
Now, for the first test run, execute the server code, and it will start hosting the web server. After creating the portal, it will provide a URL in the Python shell (refer to Fig. 7).
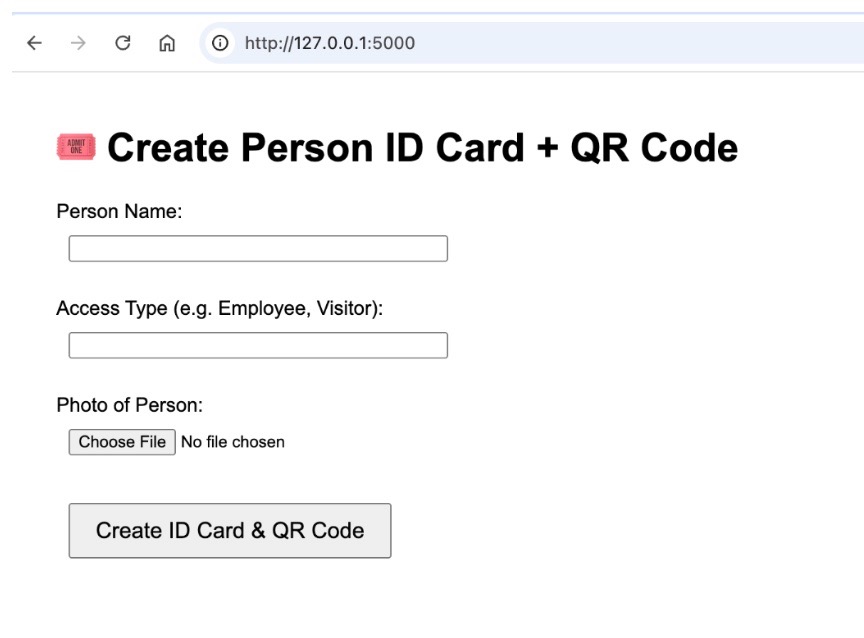
Next, open this URL in a web browser on the same Raspberry Pi or on any device connected to the same network. This will open the web-based UI for entry management.
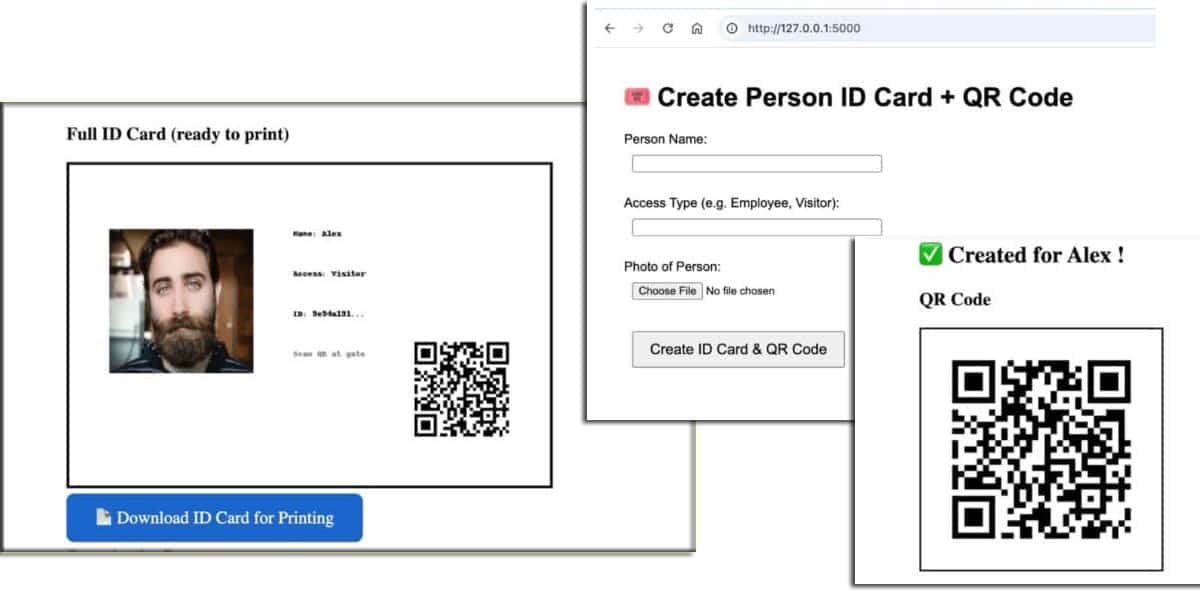
Enter the participant’s details in the UI and upload their photo. Then, click on “Generate ID Card and QR Code” (refer to Fig. 8).
After uploading the person’s photo and details, the system automatically generates the ID card and QR code. It then provides options to download, share, or print the ID card for the participant.
Additionally, it can generate a digital link that allows the user to display the ID card, while in some cases, presenting just the QR code may also be sufficient.

Now, run the scanner code. Show the QR code in front of the camera, and the system will check the database for the person’s details. If the details are found, it will grant access and open the door by activating the servo motor or actuator connected to the device.